CHRISTMAS CORK DECORATIONS

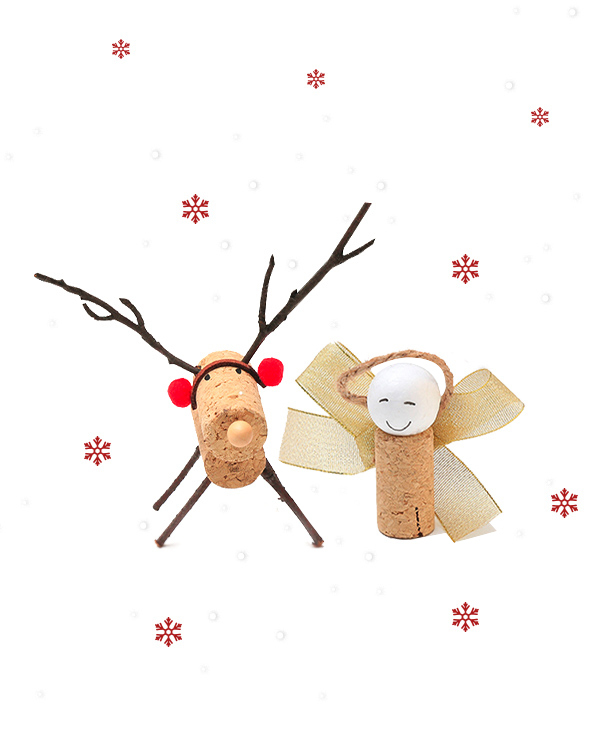
Don’t throw away your corks during the festive season – put them to good use with our Christmas cork decorations! A great Christmas craft to make with kids, choose between our cork reindeer and cork angel to try. Whether you want to add them to your tree or dot them around the house to spread some festive cheer, grab the materials below and follow our step-by-step guide to make your very own Christmas cork crafts!
What you’ll need:
- 3 x corks
- 6 x twigs
- 2 x mini pom poms
- 2 x pins
- White polystyrene ball
- Jute rope
- Gold ribbon
- Small pipe cleaner
- Super glue
- Black marker pen
Cork Reindeer
Step 1: Make the body
To start making your reindeer, take two corks and add a dab of super glue to the end of one. Then, take your other cork and position it so about half is covering the other cork and press hard to stick them together. This is your reindeer’s body!
Step 2: Add the features
Next, take your pin and attach it to the flat end of the top cork to give your reindeer a nose – you can make this red if you’re creating Rudolph! Take your black marker pen and draw two beady eyes on the cork.
Step 3: Make the earmuffs
Now, put a spot of glue on either end of the pipe cleaner and attach the mini pom poms to create your earmuffs. Then, measure where these will sit on your reindeer’s head, before glueing them on.
Step 4: Attach the legs
Next up, take four twigs and ensure they’re the same length for your reindeer’s legs. Measure where these will be on the cork and either attach them with glue or use another pin to create four holes for the twigs to slot into – make sure an adult helps with this part!
Step 5: Attach the antlers
Take another two twigs and attach these using your chosen method to the head, just behind the earmuffs, for antlers – and you’re done! Why not complete the sleigh and make all of Santa’s reindeer, from Dasher to Blitzen?
Watch the full tutorial
Follow all the steps to make your own cork reindeer in our video below!
Cork Angel
Step 1: Make the body
Just like the reindeer, the first step in making your own cork angel is to construct the body. All you need to do is add a good amount of super glue to the flat end of a cork and attach the white polystyrene ball for the head – simple!
Step 2: Create the wings
Next, it’s time to make your angel’s wings. Take your gold ribbon and carefully tie this into a large bow, ensuring there’s enough material in the loops for wings. Pull the knot tight to keep in place.
Step 3: Attach the halo
An angel wouldn’t be complete without a halo! Take your small piece of jute rope and make a circle, crossing the ends over without tying them. Then, attach this to the knot of your wings with a large gold pin, before using the same pin to attach to the back of the cork.
Step 4: Draw the face
Finally, take your black marker pen and draw your angel’s face. We’ve gone for a few simple lines to complete our angel, but you can experiment with any facial expressions you like!
Watch the full tutorial
Follow all the steps to make a cork angel in our video below!
Continue the festive fun
Looking for more Christmas crafts? Our online advent calendar is packed full of fun craft ideas, as well as delicious Mexican-inspired recipes to try during the festive season. Join the countdown to Christmas and see what lies behind each door – and don’t forget to share your creations with #OldElPasoChristmas!