Origami Christmas Decorations

Christmas Cards Banner

Christmas Origami Card

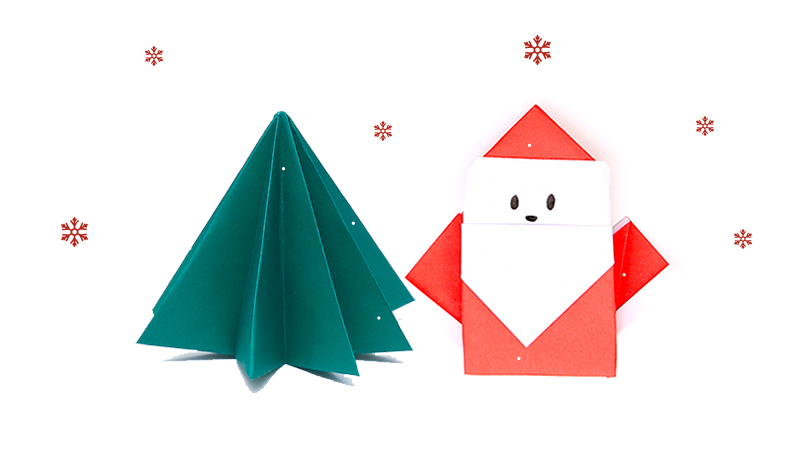
Bring the family together this season with our colourful origami Christmas decorations. The perfect Christmas craft to put your folding skills to the test, try our origami Santa or give our origami Christmas tree a go – or try both if you’re feeling festive! Follow our step-by-step guide and videos below to create your very own Christmas decorations.


What you’ll need:


  1. Square coloured craft paper
  2. Black marker pen

Origami Santa

Step 1: Half the paper

To make the perfect origami Santa Claus, we recommend using a piece of red craft paper with a white back. To begin, fold this in half to make a triangle and open the paper out again, so you can repeat for the other side. Be sure to press down hard to make a good crease!

Step 2: Fold the top

Open the paper red-side down and fold the top in towards the crease you just created to make a small triangle. Turn the end of this up and fold back towards the top. Unfold this again and fold a tiny triangle at the point of this, before rolling the edges up twice – this sounds tricky, but follow the steps in our video to help!

Step 3: Fold the bottom

Next, fold the bottom of the paper so the point touches the very top, making a big triangle. Fold the top of this back on itself to make a smaller triangle, making sure it doesn’t touch the bottom of the paper, and press down hard to keep in place.

Step 4: Fold the sides

Turn the paper back over so the red side is facing upwards. Fold the side to make a long white strip and repeat on the other side. Then, take the side of the paper and fold into the middle, before repeating on the other side again. Fold each side into the centre again and turn the ends back on itself to create Santa’s sleeves – the video will help again here!

Step 5: Draw the face

Turn your paper back over and you should have the perfect origami Santa Claus! All that’s left to do is add a pair of beady eyes and a button nose with your black marker pen and you’re done!

Watch the full tutorial

Follow all the steps to make your own origami Santa in our video below!


Origami Christmas Tree

Step 1: Half the paper

All you need to make an origami Christmas tree is your coloured paper of choice! Start by folding it in half to make a rectangle, then open the paper out again and repeat for the other side, so you have four perfect squares on the paper.

Step 2: Fold the sides

Turn the paper and fold it in half to create a triangle this time. Open the paper out again and repeat for the other side. Flatten the paper out again and fold it in half to make a rectangle, pressing hard along the crease to make a defined line – don’t worry, our video will keep you right!

Step 3: Fold the points

Use all the creases you’ve created to fold the paper into a small square and rotate this so you’ve got a diamond shape to work with. Now, for the fiddly part! Take each section in turn and fold it into the centre. Press hard, then open this piece out to become a triangle. Repeat this four times to make all your points.

Step 4: Fold the edges

Once you’ve folded all your points, you should be left with a kite shape. Work your way around the bottom folding the triangles up so you’re left with a flat edge. Then, turn your tree up to sit on this edge and fan your points out to complete your origami Christmas tree!

Watch the full tutorial

Follow all the steps to make an origami Christmas tree in our video below!


Continue the festive fun

Get into the festive spirit with our online advent calendar, packed full of fun Christmas crafts, as well as delicious recipes to try during December. Join the countdown to Christmas and see what awaits behind each door – and don’t forget to share your creations with #OldElPasoChristmas!